Electroplating 101
also: Electroforming
Once you get the hang of it, electroplating is a very straight fwd and relatively simple process. At first i tried creating my own plating solution by applying current across two copper poles in a distilled vinegar bath. The solution turned green and it did plate my cathode (-), but the layer of plated copper was always rough and would flake away or oxidize almost as soon as i took it out of the bath. Finally i ordered Copper Sulfate solution intended for electroplating, together with brightener, which replenishes the solution when the plated layer starts to become dull. See bellow for materials.

Materials and Tools
– glass container
– copper sulfate (copper sulfate is poisonous. don’t get it in your mouth! and look up how to dispose of it according to your local regulations!)
– brightener
– copper electrode (sheet copper or copper rod)
– aligator clips
– rectifier for regulating voltage/current
Wikipedia has a good explanation of how electroplating works:
>> http://en.wikipedia.org/wiki/Electroplating

Step-by-step
Seal the object
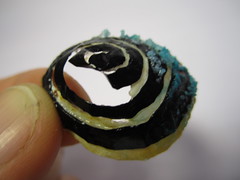
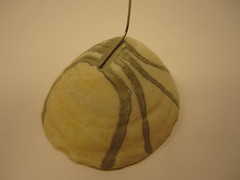
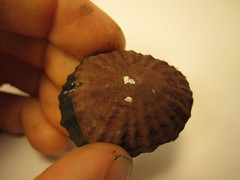
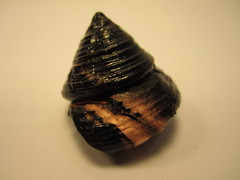
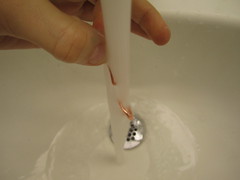
Pick the object that you want to electroplate. If it is made of a natural material like a wood or even a seashell then you probably need to first coat it in a layer of something that will seal it from the plating bath, since it will otherwise eat away at the surface of your object, dirtying the solution and making it hard to achieve a nice clean layer of copper. I’ve used nail varnish and other kinds of varnish to seal objects.
These are examples of how the plating bath can eat away at a seashell.

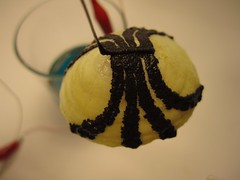
Coat the object in conductive paint
You want to apply conductive paint to the surface of your object everywhere you want the copper plating to adhere to. I have not had luck with carbon paints, which is a shame because they are so cheap and nice to work with. But instead have had great results with a water based silver paint from Conductive Compounds, WB-101. A little bit of this paint goes a long way and you only need a thin layer.
You may want to plate multiple surfaces on one object that are not necessarily connected. You have a few options here. You can either paint everything so that it connects in one point, and after plating disconnect them all again. You can add extra material on which you can connect all parts and then cut this away after plating. You can also plate each part individually.
When you coat of conductive paint is dry you are ready to plate.

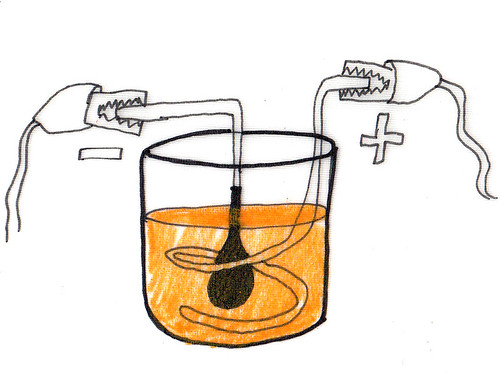
Prepare the plating bath
Pour copper sulfate in a glass container (the plating solution might eat away at plastic containers) so that there is enough or more to fully submerge your object in it. Take the copper anode (+) and bend it so that it fits in the container with your anode and the object. If you bend or curve the copper, make sure not to create any sharp bends as these will break over time and you’ll have to replace the copper.
When you electroplate you want to use a very low direct voltage, less than one volt, but be able to supply as much current as your plating bath draws. For this it is good to have a rectifier or another kind of regulating device that supplies direct current. You can use batteries to plate, though i have not had success with this yet.
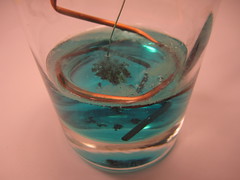
Plate
Connect the + of your power supply to the copper anode that should protrude above the surface of the solution. Connect the – of your power supply to the object you want to plate and lower it into the plating bath. Make sure that painted parts of your object are not touching the copper. And make sure there there are no bubbles forming on the surface of your object. If bubbles form then your voltage is too high and your copper coat will be clumpy and brittle.
The electroplating process can take as less as a few minutes. the longer you leave it the thicker the copper will be. Check the object regularly to see what is happening. Add a few drops of brightener to the solution if you notice that the copper is looking dull.

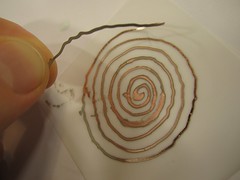
These are the kinds of plating you don’t want:
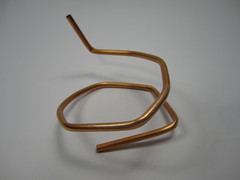
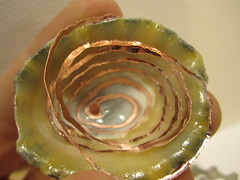
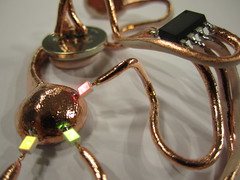
This is the kind of plating you want:

Rinse
Immediately after you remove your object from the plating bath, rinse it with water to remove all the copper sulfate solution and then pat dry. Your traces should be shiny and robust.
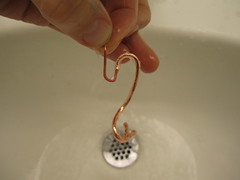
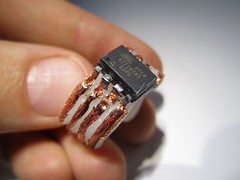
Flexible and solderable
If the object you plated to has a water repellent surface (or the sealer created a shiny repellent surface) then your traces might start to come off. But this is something that you might have done intentionally.
The traces should be flexible and not break immediately, they are pure copper and should act similar to copper wire. You should be able to solder to them without problem.
Resources
Sherri Haab has extensive resources and downloadable PDF instructions on how to electroform objects including leaves and other natural materials.
Sherri Haab >> http://www.sherrihaab-shop.com/craft-supplies/metal-etching/e3-etch.html
Other links to electroplating instructions:
>> http://www.andybrain.com/sciencelab/2008/01/27/how-to-electroplate-copper/
>> http://www.instructables.com/id/Clean-and-Simple-Electroplating/
Examples of electroplated objects by Cassy Muronaka >> http://cassymuronaka.wordpress.com/2010/08/09/easy-electroforming-with-e3-etch-2/


22 Comments so far
Leave a Reply